
Short answer
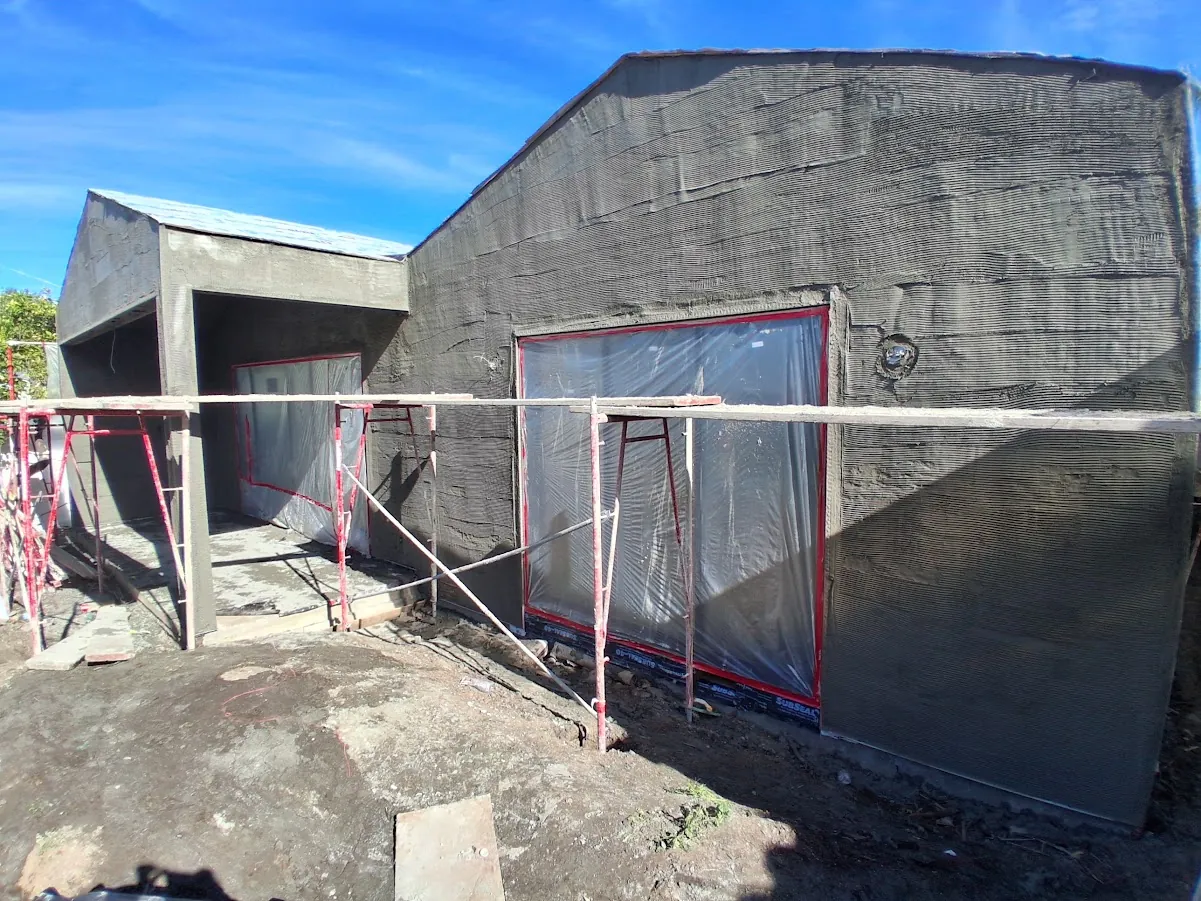
A traditional three-coat stucco assembly typically progresses through prepared substrate and weather-management details, lath and accessories, a scratch coat, a brown coat, and the final finish. Each stage depends on project-specific materials, details, and curing requirements.
01 / Stucco
Preparation determines what the coats are covering
The team first reviews the substrate, openings, flashings, transitions, penetrations, weather-resistive layers, drainage details, accessories, and adjacent roof or site conditions. A finish coat cannot correct an unresolved water path or unstable base.
Protection and access also matter. Windows, doors, roofing, paving, landscaping, neighbors, and occupied areas may need a clear protection plan before wet work begins.
02 / Stucco
Lath and accessories shape the plaster assembly
Lath, trims, screeds, control or expansion accessories where required, and opening details establish attachment and termination conditions. The exact materials and layout come from the project documents and applicable requirements.
This is an important review stage because later coats conceal many of the details that manage edges, drainage, and transitions.
- Openings and flashing interfaces
- Base, edge, and termination accessories
- Penetrations and mounted items
- Transitions to roofing and dissimilar materials
03 / Stucco
Scratch and brown coats build the base
The scratch coat establishes the first plaster layer and a keyed surface for the next coat. The brown coat develops the plane and base for the finish. Thickness, mix, application, curing, and timing must follow the approved project requirements.
Rushing between stages or allowing another trade to damage an uncured surface can affect the finish and schedule.
04 / Stucco
The finish coat defines appearance, not hidden performance
Texture, color, aggregate, application method, lighting, wall orientation, and adjacent existing work all influence the final appearance. Large samples and agreed expectations are useful before broad application.
A close match to aged or painted stucco may be possible, but an invisible patch should not be promised without understanding the surrounding finish.
Field checklist
Before exterior plaster starts
- Substrate and weather-management details reviewed
- Openings, flashings, penetrations, and accessories coordinated
- Scaffolding, access, and protection plan confirmed
- Approved system, finish, color, and sample expectations documented
- Curing and weather conditions planned
- Adjacent trade work sequenced to avoid damage
Stucco FAQ
Questions project teams ask
Why are there multiple coats?
The coats serve different functions: establishing attachment and a keyed base, building the plaster plane, and creating the visible finish. The approved assembly determines the actual materials and thicknesses.
Can the finish coat hide a wavy base?
The finish follows the base beneath it. Plane, transitions, and surface preparation should be addressed before the final texture is applied.
How long does three-coat stucco take?
Duration depends on area, access, weather, curing requirements, detailing, inspections, finish selection, and coordination. The project-specific schedule should not be reduced to a generic day count.